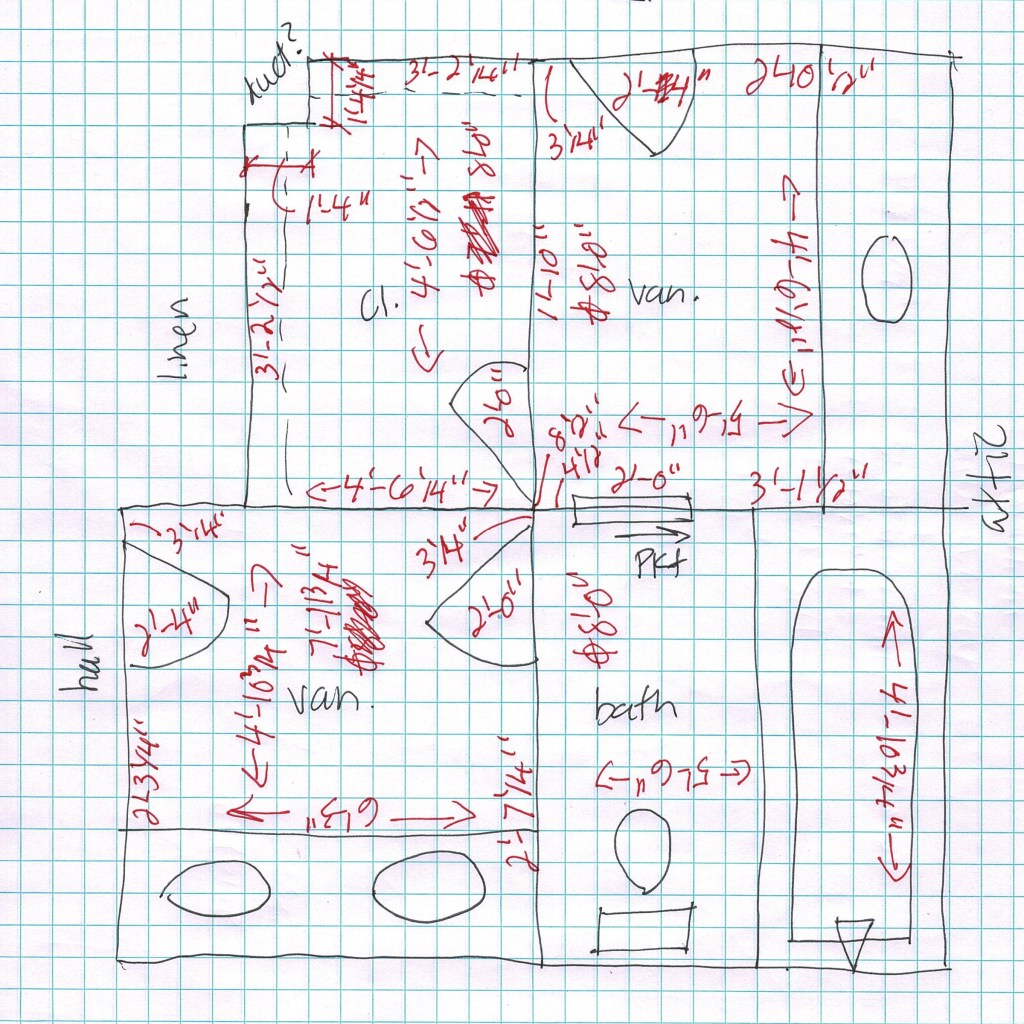
Step 1 – Document Your Existing House
The first phase of a renovation or addition project is to create accurate drawings of your house. This image shows the measurements we take so we can create drawings to begin your project. Then once we have an accurate base to work from, the creativity begins!
Step 2 – Design Options
After we have accurate drawings of your house, we will come up with design options for your renovation or addition. This allows us to explore ideas of how to accomplish your house goals.
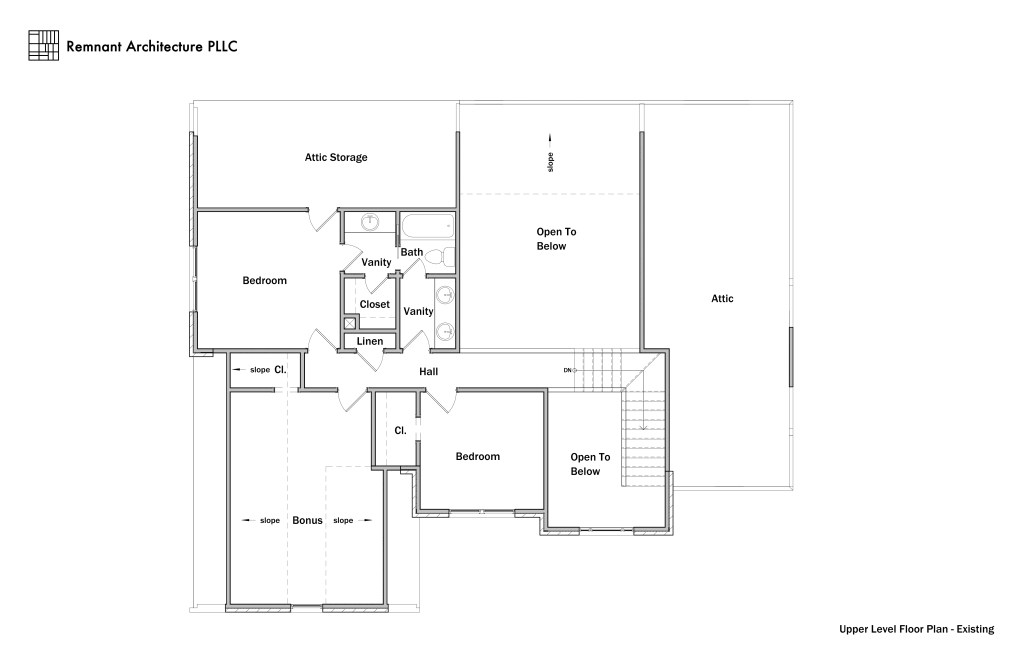
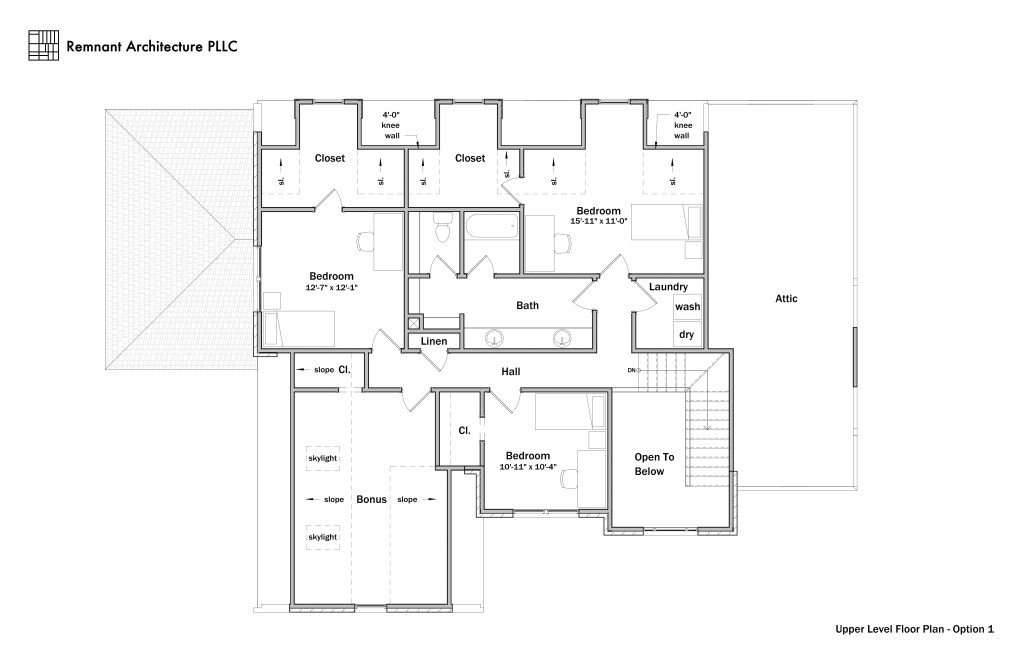
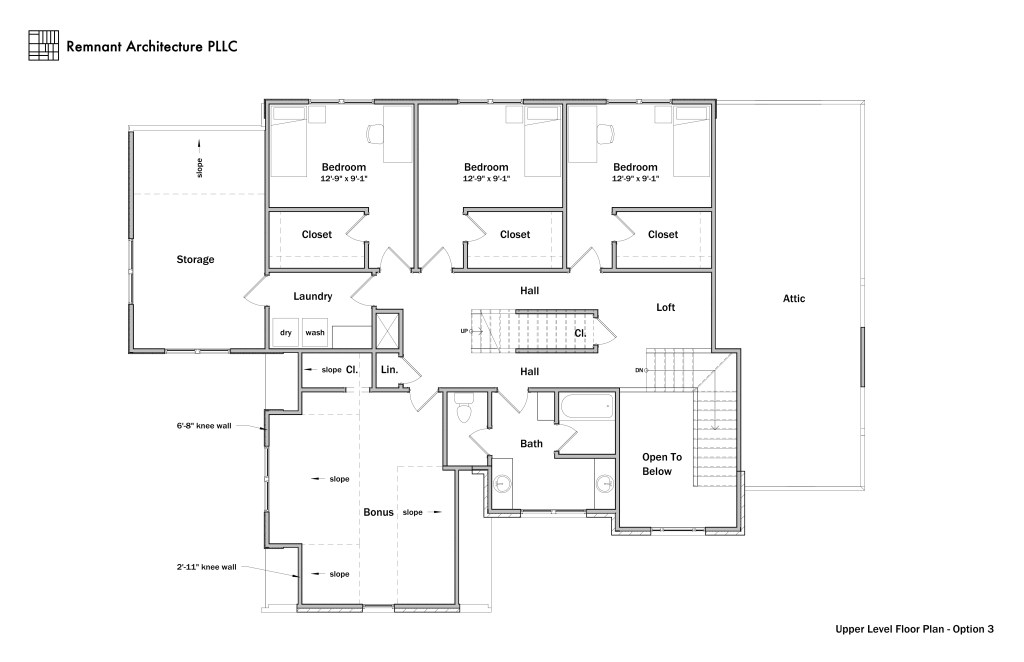
The project in these images is a cookie-cutter house that needed some reworking of the upper level floor plan. The homeowners felt the vaulted living room on the main level was wasted space, especially with their three children having bedrooms on the upper level. The options presented reimagined the upper level with the gained space above the living room. Option 1 is the minimal option. Option 3 is the more invasive option. Option 2 is the in-between option.

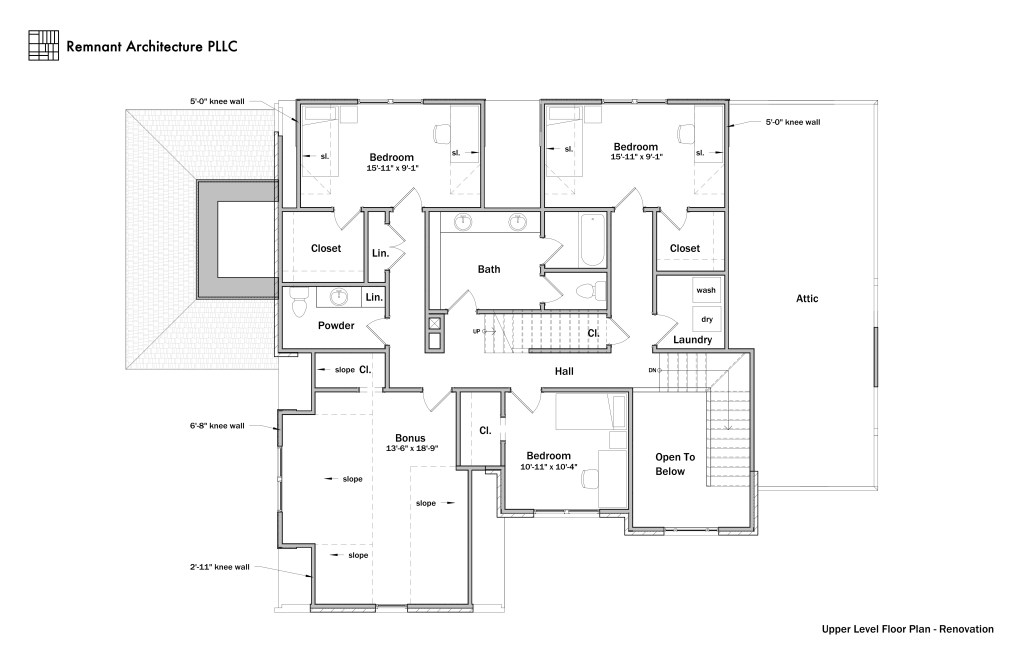
Step 3 – Refine Into A Final Design
After we show you the possibilities for your house, we want to get your feedback so we can refine the ideas into your cohesive design that will be used as the basis for your construction drawings. You might choose one option or combine your favorite parts from different options for the revisions. Typically, there will be two rounds of revisions to get to your final design.
So how did the design for the cookie-cutter renovation turn out? Option 2 was used as the main form of the design, but some elements from Option 1 and 3 were implemented as well (bathroom, stairs to the attic level).
Want to find out more about the cookie-cutter renovation? Check out the project page.

Leave a comment